 ElevateBoost







 Marvel Rivals
A good Marvel Rivals aim training routine is not a Counter-Strike warmup copied over. The game runs on a 100-degree FOV, uses large hitboxes, mixes hitscan with projectile heroes, and asks you to track flying Vanguards while dodging dive Duelists. The 20-minute daily routine below is built around those realities and transfers directly to Competitive points, not to a Kovaak's score.
Why Marvel Rivals needs its own aim training routine
Three things make Marvel Rivals aim different from any FPS you have warmed up for before. First, the base FOV is 100 degrees on PC and projectile velocities sit between 80 and 180 meters per second — much slower than Valorant bullets but much faster than Overwatch Pharah rockets. Second, Vanguards like Hulk, Venom and Thor move in true 3D with wall grabs and leaps, so target elevation changes mid-flick. Third, half the roster uses projectiles with lead-time requirements, which rewards prediction, not raw mouse speed.
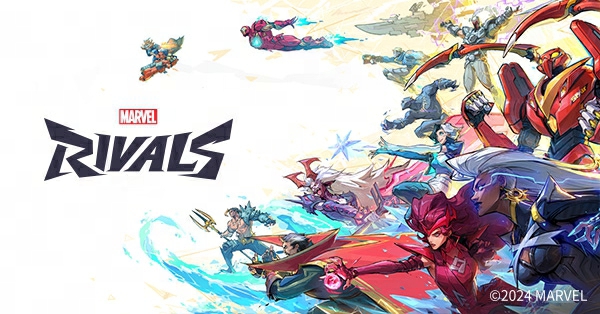
That is why generic routines fail to transfer. A tracking playlist built for Overwatch Soldier 76 teaches you to glue to a target at ground level; it does nothing for Hela charged shots or Iron Man unibeam at 30 meters elevation. The routine below is split into four five-minute blocks, each targeting a specific skill the game actually tests on ranked ladder.
The 20-minute daily Marvel Rivals aim training routine
Run this before your first competitive match of the day. Do not run it after a loss streak — tilted aim training burns neural bandwidth without laying any down. Use the same mouse DPI, the same sensitivity and the same monitor refresh rate you play ranked with. Switching between a 400 DPI aim trainer profile and 800 DPI in game is the single most common reason routines do not transfer.
Minutes 1–5 — Static tracking and wrist warmup
Open Aim Lab or Kovaak's and pick a slow linear tracking scenario (Smoothbot, Centering II, 1wall6targets TE). The point is to wake up the small muscles in your forearm, not to score. Keep the crosshair glued to the bot for three continuous passes without clicking.
- Target speed set to 60 to 70 percent of maximum — Marvel Rivals Vanguards do not sprint faster than this at effective range.
- No ADS, no clicking. Pure tracking for the full five minutes.
- Aim at the chest hitbox, not the head. Marvel Rivals headshot multipliers only apply to a handful of heroes and the chest is the reliable damage zone.
Minutes 6–10 — Flick training on strafing targets
Switch to a flick scenario that uses stationary targets with short visibility windows (Tile Frenzy, 1w2ts Reload, Close Fast Strafes). Marvel Rivals mid-range duels last 1.1 to 1.4 seconds between first visibility and first kill — you need flicks that land inside that window, not perfect flicks that land too late.
- Set the target visibility to 1.2 seconds. That is the real combat window.
- Do not reset between flicks. Chain shots the way Hela or Hawkeye forces you to in a team fight.
- Score goal: hit 70 percent of your flicks on the chest. Below 60 percent means your sensitivity is too high.
Minutes 11–15 — Clicking under pressure
Move to a reaction scenario where targets appear anywhere on screen with no warning (Gridshot, PGTI, Reflexshot). This simulates the moment a Spider-Man dives your back line and you have 400 milliseconds to turn and tag him before he gets off a swing animation.
- Field of view in the aim trainer set to 103 (vertical) or 90 (horizontal 16:9) to match Marvel Rivals.
- Target distance mixed: close, medium and far on the same playlist.
- If you break your own daily high score, stop. Overshooting your peak is how you build a flinch, not a reflex.
Minutes 16–20 — In-game Practice Range
Close the aim trainer and open the Marvel Rivals Practice Range. This is the only drill that uses the actual hitboxes, projectile speeds and recoil patterns you will face on ladder. Spend four minutes on your main hero and one minute on your pocket pick.
- Hitscan main: 50 bodyshots then 50 headshots from mid-range on the moving bots.
- Projectile main: 30 lead shots on the strafing bot plus 10 charged shots at max range.
- Vanguard main: 20 melee cancels and 20 ability combos — Vanguards still need aim for secondary fire or beam alignment.
Aim trainer settings that match Marvel Rivals
Any aim training routine falls apart if the mouse feels different between the trainer and the game. These are the three settings people get wrong most often.
- Sensitivity conversion: Marvel Rivals uses the same formula as Overwatch. If you play Overwatch at 5 with 800 DPI, use the same number in Marvel Rivals, no multiplier. For Aim Lab, pick the Overwatch sensitivity profile.
- Mouse polling rate: 1000 Hz in both. A 500 Hz mouse feels sluggish on hitscan heroes and will throw off your flick calibration.
- Monitor refresh and in-game FPS cap: keep them identical in both apps. If your game runs at 240 FPS capped, cap your aim trainer at 240 too — the input latency changes feel enough to retrain muscle memory wrongly.
Hero-specific aim drills
The 20-minute core routine is general purpose. Add two to three minutes of targeted work for the hero you play most. Do this on top of the routine, not in place of a block.
Hitscan Duelists — Hela, Hawkeye, Black Widow, Winter Soldier, Punisher
These heroes live and die by headshots at mid to long range. Train in Aim Lab's Microshot or Kovaak's 1wall6targets Small. 60 to 70 percent headshot rate at 20 meters is the ranked-ready baseline.
Projectile Duelists — Iron Man, Storm, Namor, Squirrel Girl
Lead shots are the whole game for this role. Use any projectile tracking scenario (Fluffy Tracking Reborn, Air Angelic) and set projectile speed to 100 m/s to match Iron Man unibeam. If a booster is helping you learn the projectile arc, a few duo sessions on the Marvel Rivals rank boost service with a Grandmaster can shortcut the muscle memory you build in solo practice.
Beam and tracking heroes — Scarlet Witch, Jean Grey, Rocket Raccoon
Smoothness is more valuable than speed. Use the slow tracking scenario from the warmup but double the time to ten minutes before ranked. Keep crosshair on the chest hitbox and let the bot's movement teach your wrist the correction curve.
How to measure progress each week
Aim does not improve from grinding — it improves from measuring and adjusting. Track one number per block, weekly, and tweak only when a block plateaus for seven days.
- Tracking block: average time-on-target in Smoothbot. Add 5 percent per week.
- Flick block: percentage of first flicks landed in Tile Frenzy. Target 65 percent after one month.
- Reaction block: Gridshot score. Add 500 points per week until you plateau, then stop.
- In-game: your damage per 10 minutes in competitive, pulled from the Career tab after each session.